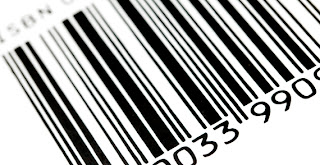
Right barcode for the job
There’s a multitude of different barcodes out there, wayyyyy too many to list so we’ve just included a brief description of the main ones. On the whole in retail packaging you’ll find yourself dealing with EAN13 & EAN8, or if in the United States their respective counter parts, UPC-A & UPC-E. As such most of this guide deals these as a base.Here’s a small run down on some of the main barcodes you can find.
To be or not to be
Don’t add a final barcode if you don’t have to, it’s easier, quicker and all together much less painful if you just add a placeholder barcode as 9 times out of 10 the printer will replace your barcode before printing anyway. This normally comes in the form of an all 0′s barcode, that’s correctly sized, coloured and placed.Sizes
Barcodes come in percentages and each print process has some basic guidelines you can follow for minimum sizes.Litho
Recommended size 100%, minimum size 80%.Felxo
Recommended size 120%, minimum size depends on the printer, 100% is occasionally possibleGravure
Gravure printing allows for higher quality than flexo and as such you should be all right with 100%.As you may have guessed if in doubt ask your printer as they will be able to advise as to their minimum required size as you never really know. If you have been supplied with a printer specification sheet then you should be able to find the information there. If contact with the printer isn’t possible stick to the recommended sizes above and cross your fingers!
Colours
The red laser that reads the barcode needs contrast and as such correct colour choice is essential. Below you can see the do’s and don’ts of barcode colouring.Styling
You do have the ability to change certain aspects of your barcode. The font and position of the numbers, adding a light margin indicator (that little arrow you sometimes see) and the colour. But options are limited and the most important thing is that the barcode is legible for manual input in case it doesn’t read at checkout, so overall we don’t recommend getting too carried away. The standard font used is OCR-B and for us that does just fine, if you want to use helvetica then we won’t complain but a serif font wouldn’t be our recommendation.Programs
There may be times when you need to add a Barcode to your artwork and as there’s a host of programs out there to help you do it. Expensive, cheap or free, what’s the difference ? if they do the job then they do the job right ? For this article we looked at around 10 barcode programs ranging from free to rather expensive and it turns out that the beloved mantra, you get what you pay for, is pretty much spot on. Here are our top 3 winners:Barcode Producer
Seems to be the one to use these days but at $299 it’s not cheap. That said it’ll do just about anything you want with ease, so it’s our clear winner when it comes to packaging design.Agamik Barcoder
Once an industry must have, it’s now faded into the background somewhat, still might be worth checking out as a quick test and it seems to work just fine. Sadly no price is stated so you’ll have to phone for details.Easy Barcode Creator
The cheapest option we could find that seems to work well but output is limited to only a few barcodes and your not able to export anything without a full license so we couldn’t fully test it. That said it covers the basics well so if your on a budget then maybe this is the one to go for.Free
We tried 3 different online barcode generators. 2 gave no control over the percentage instead opting for words like small, medium or large and the third, that did allow for an input scale, showed a concerning difference in size to a true 100% barcode. As such we do not recommend the use of online barcodes as the simply aren’t accurate enough for professional use.Truncation
What? I here you cry. Well this is how tall or small the barcode is, measured from the base of the shorter lines we once again find ourselves with minimum recommended sizes but it’s altogether easier to understand. 14mm is the recommended height, 12mm should be fine, 10mm is pushing it and anything else you’ll have to check with the printer or the previous packaging if doing a redesign. On items such as toothpaste you’ll almost definitely have to truncate your barcode more, if in doubt ask your printer.Quiet Zones
Why do they keeping saying these strange words, well the world of barcodes is full of them but luckily we’re here to help, so put simply this is the empty space at each side of the barcode which ensures it’ll have no problems scanning. Our recommendation is to leave a minimum space of 2 – 2.5mm each side, leave less at your own risk!Where’s it going
Flat Surface or Round ? If the barcode is going onto a flat surface then you can position however or wherever you like.However with round surfaces, such as a bottles, you’ll need to position the barcode so that the lines follow the curve, i.e lines horizontal not vertical. This stops them from distorting and as such means no problems at the checkout.Creative Barcodes
For many years now we’ve seen creative applications of barcodes, this is because once you’ve allowed for your 14mm height the rest is up to you. So in this case the only limitation is your mind. Check out these examples for some ideas.Disclaimer: Some images hosted on this blog have been collected from external research associates to be presented as stimulus to those seeking news from the cutting edge of packaging. The imagery is not being presented as our own and copyright still belongs to the owner/creator of said work.


No comments:
Post a Comment